Key takeaways
- 15.5 in width — most 6- to 10-outlet power strips run 10–14 in long, so a full-size strip drops in flat with room for the cord to exit either end.
- ~4 in depth — deep enough that laptop bricks and chunky AC wall-warts sit below the rim instead of teetering on top.
- ~4 in hang-down — mounted at the rear of a 30 in-deep top, the tray bottom sits around 23 in off the floor at sitting height, well above knees and thighs.
- Load — a loaded strip plus four or five adapters weighs roughly 3–6 lb, which two screw flanges handle easily. A compact UPS battery backup (8–12 lb) belongs on the floor, not in the tray.
What's inside
The UPLIFT Desk Wire Management Tray is a powder-coated steel basket — roughly 15.5 in wide, about 4 in deep, and hanging about 4 in below the desktop — that screws into the underside of almost any wood, laminate, or bamboo top at least 3/4 in thick. It is not locked to UPLIFT desks; it fits most standing and fixed-height desks you can drive a screw into. One tray handles a laptop-and-monitor setup; plan on two trays for dual monitors with a docking station, and skip it entirely on glass or metal tops.
Tray dimensions and what actually fits inside
UPLIFT has revised the tray over the years, so confirm the current spec sheet before drilling, but the standard tray is about 15.5 in wide × ~4 in deep × ~4 in tall. Those numbers matter more than they look:
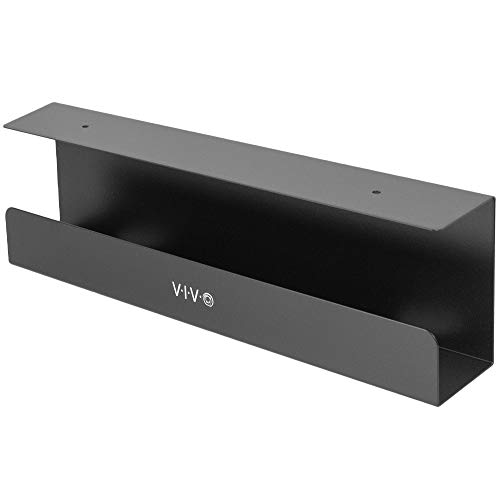
VIVO Low Profile 17 in Under Desk Cable Management Tray
Included for 'UPLIFT Desk Wire Management Tray Guide: Fit, Install and Cable Setup' as a relevant option in this category; details come from the product listing.
View on Amazon
Monoprice Under Desk Cable Tray - Steel with Power Supply and Wire Management - Workstream Collection White
Included for 'UPLIFT Desk Wire Management Tray Guide: Fit, Install and Cable Setup' because the listing specifies Steel with Power Supply and Wire Management and Workstream Collection White, details this guide uses to compare options.
View on Amazon
Univivi No Drill Under Desk Cable Management Tray, 36 inch Cable Management
Included for 'UPLIFT Desk Wire Management Tray Guide: Fit, Install and Cable Setup' because the listing specifies 36 inch Cable Management, details this guide uses to compare options.
View on Amazon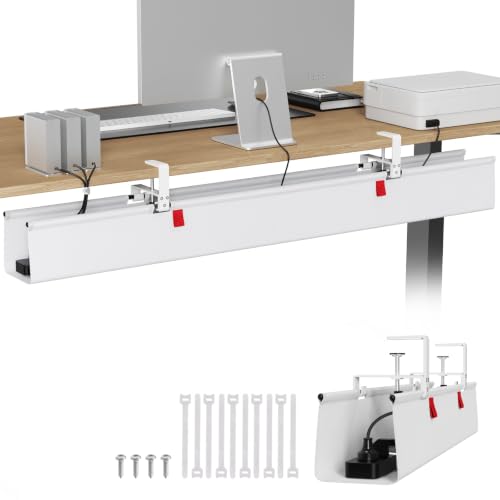
KEEGH Extra Large No Drill Under Desk Cable Management Tray 48 in, White
Included for 'UPLIFT Desk Wire Management Tray Guide: Fit, Install and Cable Setup' because the listing specifies White, details this guide uses to compare options.
View on Amazon- 15.5 in width — most 6- to 10-outlet power strips run 10–14 in long, so a full-size strip drops in flat with room for the cord to exit either end.
- ~4 in depth — deep enough that laptop bricks and chunky AC wall-warts sit below the rim instead of teetering on top.
- ~4 in hang-down — mounted at the rear of a 30 in-deep top, the tray bottom sits around 23 in off the floor at sitting height, well above knees and thighs.
- Load — a loaded strip plus four or five adapters weighs roughly 3–6 lb, which two screw flanges handle easily. A compact UPS battery backup (8–12 lb) belongs on the floor, not in the tray.
The tray is open steel with no moving parts, so nothing wears out — the failure point is the screw holes, not the tray. Over-torque the screws into particleboard and the holes strip; snug them by hand and the mount outlasts the desk.
Fit by desk size: how many trays and where
UPLIFT ships its tops in five common widths, all typically 1 in thick. The right tray count scales with how many power bricks the width implies:
| Desktop size | Trays needed | Placement |
|---|---|---|
| 42 × 30 in | 1 | Rear center, beside the control box; tuck laptop brick + strip |
| 48 × 30 in | 1–2 | One tray unless you run a dock + external drives; second goes rear-left |
| 60 × 30 in | 2 | Rear-left and rear-right of the frame crossbar, strip in one, bricks in the other |
| 72 × 30 in | 2 | As above; leaves center clear for a clamp-on CPU holder |
| 80 × 30 in | 2–3 | Third tray only if you rack speakers, audio interface, or two PCs |
On 24 in-deep space-saver tops the tray still works, but push it fully against the rear edge — there is no spare depth to waste. On L-shaped tops, treat each leg of the L as its own desk and mount one tray under the section holding the power strip.
Non-UPLIFT tops
Any top that is at least 3/4 in thick and accepts screws is fair game — solid wood, bamboo, rubberwood, laminate over particleboard or MDF. Two traps:
- Hollow-core tops (many budget tops are cardboard honeycomb inside) cannot hold screws — the tray will sag within weeks.
- Glass, metal, or sub-3/4 in tops — do not drill. Use a clamp-on cable tray instead; no holes, no risk.
Mounting it: step-by-step
Budget 10–15 minutes per tray. A drill/driver, a 3/32–1/8 in pilot bit, painter’s tape, and a pencil are the whole toolkit.
- 1. Map the underside. On a sit-stand frame, the crossbar, motor housing, and control box claim the middle-rear zone. Pick a spot in the rear 6–8 in of the top where the tray clears all of it — on a 30 in-deep top, the tray’s front edge should sit roughly 20–24 in back from the front lip.
- 2. Dry-fit and mark. Hold the tray in position (a second set of hands or a strip of painter’s tape keeps it in place) and pencil through the mounting holes.
- 3. Drill pilots. Wrap tape on the bit as a depth flag: about 5/8 in deep for a 1 in top, 1/2 in for a 3/4 in top. Pilots stop laminate from mushrooming and keep the screw path straight.
- 4. Drive the screws. Use a hand screwdriver or a drill on its lowest clutch setting. Snug means snug — spinning the screw after it seats chews the particleboard.
- 5. Check screw length on thin tops. The included hardware is sized for ~1 in tops. On anything thinner, swap in screws 1/8–1/4 in shorter than the top’s thickness so tips can’t ghost through the surface.
Cable setup for a sit-stand desk
Height-adjustable desks fail at cable management in one specific way: the cable run to the wall has to stretch as the desk rises. Solve it with the one-cord-out rule — the only thing leaving the desk is the power strip’s cord:
- Mount or nest the strip in the tray with its switch facing outward so you can kill power without crawling under the desk.
- Plug everything on the desktop into the tray strip; coil excess cable into the tray or a velcro loop beside it.
- Route the strip’s cord down the back of one desk leg using adhesive clips or a flexible cable spine. Leave a 15–18 in slack loop at the desk’s lowest position — that slack is consumed as the desk rises.
- Test full travel before finishing: raise the desk to max height and watch the cord. It should never go taut, and nothing should dangle into the leg path where the anti-collision sensor zone is.
- Use velcro ties, not zip ties, within 6 in of any port — over-cinched zip ties stress connectors and are annoying to re-do when you swap a monitor.
How it stacks up against other under-desk options
The tray is one of four common ways to tame desk cables, and it is not always the right one:
| Option | Typical size | Mount | Holds | Typical price | Best for |
|---|---|---|---|---|---|
| UPLIFT Wire Management Tray | ~15.5 in | Screws into top | Strip + bricks | About $30, or bundled in UPLIFT’s Advanced Wire Management Kit ($50–$70) | UPLIFT and other wood tops |
| J-channel raceway | 30 in sections | Screws or adhesive | Cables only — no room for bricks | $15–$25 for a 2-pack | Routing along the rear edge on a budget |
| Mesh trunking (IKEA Signum style) | ~27.5 in | Screws into top | Strip + cables, open mesh | $10–$20 | Cheapest way to span a wide top |
| Clamp-on tray | 16–24 in | Clamps, zero drilling | Strip + adapters | $25–$45 | Renters, glass tops, thin tops |
| Neoprene zip sleeve | varies | Wraps cables | Bundled cords only | $10–$20 | Finishing the leg-to-wall run |
The UPLIFT tray’s real advantage is rigidity and depth — bricks stay put and the open top makes re-plugging easy. Its disadvantage is width: a single J-channel or Signum covers more horizontal span for less money, which is why the two-tray layout is the move on 60 in-plus desks rather than expecting one tray to do everything.
Mistakes that cause problems later
- Mounting too far forward. The tray hangs ~4 in; at a low sitting position a forward-mounted tray becomes a knee-knocker. Keep it in the rear third of the top.
- Forcing a UPS into the tray. Battery backups are the heaviest thing under most desks — floor them, or use a dedicated floor-side stand.
- Anchoring cables to the wall or floor. Anything fixed to a point that doesn’t move with the desk will pull taut or rip out at standing height.
- Skipping pilots on laminate. Driving screws cold into laminated particleboard chips the finish around each hole.
- Blocking the control box. Leave 2–3 in of clearance around the UPLIFT control box and keypad cable so you can still reach the reset and anti-collision controls.
FAQ
Does the UPLIFT wire management tray fit non-UPLIFT desks?
Yes — the mount is generic screws, so any screwable top at least 3/4 in thick works. Glass, metal, and hollow-core tops are the exceptions; use a clamp-on tray there.
One tray or two?
If your gear is a laptop, one monitor, and a phone charger, one tray is enough. Dual monitors with a dock, a desktop tower, or speakers on the desk earns a second tray — split loads so one tray holds the strip and the other holds bricks and slack cable.
Will a surge protector fit inside?
Standard strips up to about 14 in long drop in flat. Oversized 12-outlet “power bar” style units may ride above the rim; measure yours first.
Can I mount it without drilling?
No — the UPLIFT tray is screw-mount only. If drilling is off the table (rental furniture, glass top), buy a clamp-style tray by spec instead.
Where exactly should it go on a 60 in UPLIFT top?
Rear-left or rear-right of the control box, front edge of the tray roughly 22–24 in back from the front lip. Center it under wherever your power strip’s cord exits so the leg drop is short.