Our Top Picks
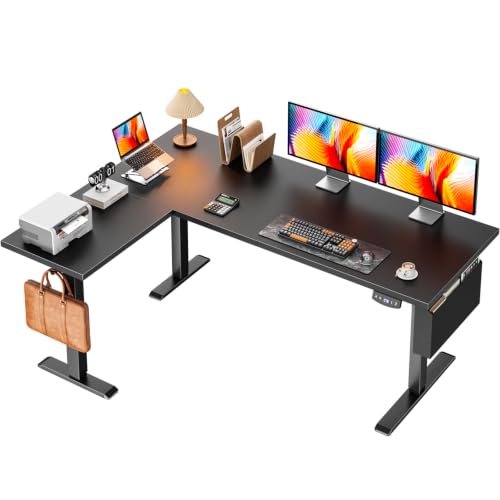 Korfile 63" L Shaped Standing Desk Height Adjustable63 inch47.2 x 63 x 46.5 inches68 poundsCheck on Amazon


L shaped desks solve a real problem: you need surface area for a monitor array or a monitor-plus-paperwork setup, and a straight desk forces you to either go absurdly wide or stack things on top of each other. Adding a keyboard tray to the equation solves a second problem, which is that most L desks sit at 29-30 inches high, and that’s too tall for comfortable typing if you’re under 5’8″ or you want your elbows at a 90-degree angle instead of reaching up. The tray drops your typing surface 2-4 inches and frees up the desktop for the monitors.
The catch is that L desks with a factory keyboard tray built in are rare. Most of the time you’re buying an L desk and a separate under-desk tray, and the two have to actually fit together, which is where people get this wrong.
Why tray placement matters more than the desk itself
On an L desk, you’ve got two viable spots for a keyboard tray: under the long side (the main desk run) or under the corner where the two sides meet. The corner placement sounds efficient but it’s usually bad in practice, because corner connector brackets and the center support leg eat into the clearance you need for a tray to slide. If you’re buying a tray separately, measure the clear width under whichever section you plan to mount it on, not just the desk’s overall footprint. You want at least 24 inches of unobstructed width and 20 inches of depth from the front edge to any crossbar or leg.
A lot of budget L desks use a single center leg plus a diagonal support brace underneath, and that brace is the thing that ruins keyboard tray installs. People buy a tray, get it home, and find the mounting clamp has nowhere to grab because the brace is right where the clamp needs to go. Check the desk’s underside photos or spec sheet for brace placement before you order a tray, not after.
Built-in tray vs. aftermarket tray
A small number of office-furniture-style L desks ship with an integrated keyboard tray on a slide-out rail. These are more common in commercial/office furniture lines than in the gaming-desk or budget-desk category. The upside is the tray is sized and positioned correctly from the factory, with no guesswork. The downside is you’re paying for a feature you can’t swap or move if the fit turns out wrong for your chair height, and these desks tend to run $350 and up.
For most people, buying a standalone L desk and adding an aftermarket under-desk keyboard tray is the better value. You get to pick tray height, tilt, and position independently of the desk, and a decent clamp-mounted tray runs $30-60 versus the $100+ premium a built-in tray adds to a desk price. The trade-off is installation time (30-45 minutes with a drill) and the brace-clearance issue above.
Three realistic configurations
| Setup | Approx. cost | Best for | Main failure mode |
|---|---|---|---|
| Budget L desk + clamp-on tray | $150-220 total | Home offices, single monitor + laptop | Center brace blocks clamp; tray wobbles if desk top is thin particleboard (under 0.75″) |
| Mid-range L desk + bolt-on tray | $250-350 total | Dual monitor setups, daily 8hr use | Tray height not adjustable enough for very tall/short users |
| Office furniture L desk with integrated tray | $400-700 | Permanent office setup, resale/corporate environments | Fixed tray position doesn’t suit everyone; expensive to change your mind |
The middle option is the sweet spot for most home setups. The desk itself should have a solid-core or at least 1-inch-thick top, since thin tops flex under a clamped tray and you’ll feel it as a slight bounce when typing with any force.
If you want a standing option
Keyboard trays and sit-stand L desks don’t mix well unless the tray mounts to the moving frame rather than a fixed crossbar, since a tray fixed to a stationary support will either collide with the desktop at full height or hang in your lap at sitting height. If you’re shopping L shaped standing desks, check specifically that the tray or keyboard arm attaches to the frame’s moving column, not a separate leg. A lot of listings don’t make this clear in the main photos, so check the Q&A section or product dimensions page before buying.
What to actually buy
If you’re under 5’8″, have a desk at standard 29-30 inch height, and type for more than two hours a day, a tray isn’t optional, your wrists will tell you within a few weeks. If you’re over 6 feet tall or your desk is already on the shorter end (around 28 inches), you may not need one at all; test typing at desktop height for a week before spending money on a tray you won’t use.
For the desk itself, don’t overthink the “L shaped” part. The genuinely useful differences between L desks are top thickness, leg/brace placement, and whether the corner connection is a separate bracket piece (weaker, more wobble over time) or a continuous molded corner (sturdier, usually a bit pricier). Browsing L shaped desks with a keyboard tray directly will surface the handful of models that include one, but confirm tray clearance against your own chair and keyboard dimensions before buying, since listing photos routinely show the tray in isolation without the brace visible.
Skip the tray only if you’re already comfortable at desktop height, or you plan to use a mechanical keyboard with tall keycaps and a thick wrist rest, since that combination often puts your hands back near proper height anyway without a tray at all.