Key takeaways
- Place the monitor perpendicular to windows, not facing them or with a window directly behind.
- Aim for ambient light around 300 to 500 lux for screen work; brighter rooms wash out the display.
- A desk lamp with an asymmetric or adjustable head lights paperwork without bouncing off the screen.
- Match screen brightness to the room: a white page on screen should look like a sheet of paper on the desk, not a light source.
An ergonomic workstation setup puts your feet flat, knees roughly level with hips, elbows near 90 degrees at keyboard height, the top of the monitor at or slightly below eye level, and the screen about an arm’s length away. Set things up in the right order, chair first and monitor last, and almost any desk can be made to fit you.
The correct order to set up a workstation
Most people start with the desk and then try to make their body fit around it. The correct workstation set up works the other way: your body sets the measurements, the chair adapts to your body, and everything else adapts to the chair.
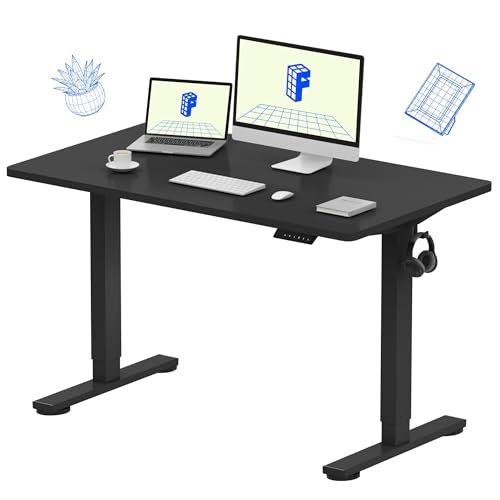
FLEXISPOT EN1 One-Piece Standing Desk, Electric Adjustable with 4 Memory Presets, 176 LBS Capacity, Stable & Quiet, Seamless Desktop for Home Office & Dual Monitors, 48"x24" Black
Included for 'Ergonomic Setup of a Workstation: Step-by-Step Order, Heights by User Size and Fixes' because the listing specifies Electric Adjustable with 4 Memory Presets and 176 LBS Capacity, details this guide uses to compare options.
View on Amazon
FLEXISPOT Standing Desk Converter, 36", Black
Included for 'Ergonomic Setup of a Workstation: Step-by-Step Order, Heights by User Size and Fixes' because the listing specifies 36" and Black, details this guide uses to compare options.
View on Amazon
FLEXISPOT EN2 55"x28" Whole-Piece Standing Desk with Power Strip, Maple
Included for 'Ergonomic Setup of a Workstation: Step-by-Step Order, Heights by User Size and Fixes' because the listing specifies Maple, details this guide uses to compare options.
View on Amazon
FLEXISPOT 71 x 63 Reversible L-Shaped Corner Standing Desk, Black
Included for 'Ergonomic Setup of a Workstation: Step-by-Step Order, Heights by User Size and Fixes' because the listing specifies Black, details this guide uses to compare options.
View on AmazonStep 1: Adjust the chair to your legs
- Raise or lower the seat until your feet rest flat on the floor and your thighs are roughly parallel to it, with knees at or slightly below hip level.
- Set seat depth so there are two to four finger-widths (about 2 to 3 inches) between the front edge of the seat and the back of your knees.
- Sit all the way back. Adjust lumbar support so it fills the curve of your lower back, usually 6 to 10 inches above the seat.
- Set the backrest recline between about 100 and 110 degrees. Fully upright at 90 degrees loads the spine more than a slight recline.
Step 2: Find your elbow height
Let your arms hang relaxed, then bend your elbows to about 90 degrees. The underside of your forearms is your target keyboard height. Lower the armrests until they just touch your forearms without lifting your shoulders, or remove them if they collide with the desk.
Step 3: Match the desk or keyboard to your elbows
If the desk is adjustable, set it so the keyboard’s home row sits at elbow height or up to an inch below. If the desk is fixed and too high, raise the chair until your elbows match, then add a footrest so your feet stay supported. If the desk is too low, raise it with leg risers.
Step 4: Place the keyboard and mouse
Center the keyboard’s B key in front of your navel, not the whole keyboard; on a full-size keyboard the number pad pushes the mouse too far right. Keep the mouse right beside the keyboard at the same height. Wrists should be straight, not bent up on raised keyboard feet; most people do better with the feet folded flat.
Step 5: Set the monitor last
Place the screen directly in front of you, 20 to 30 inches from your eyes. Raise or lower it so the top line of text is at or slightly below eye level. Tilt the screen back 10 to 20 degrees. Bifocal and progressive lens wearers should lower the monitor further, often 1 to 2 inches, to avoid tipping the head back.
Reference measurements by user height
These are approximate starting points for seated work, measured from the floor. Fine-tune by 1 inch either way.
| User height | Seat height | Keyboard / desk height | Eye level (seated) | Standing desk height |
|---|---|---|---|---|
| 5’0″ | 15–16 in | 22.5–23.5 in | 40–42 in | 36–38 in |
| 5’4″ | 16–17 in | 24–25 in | 42–44 in | 38.5–40 in |
| 5’8″ | 17–18 in | 25.5–26.5 in | 44–46 in | 41–42.5 in |
| 6’0″ | 18.5–19.5 in | 27–28 in | 46–48 in | 43–45 in |
| 6’4″ | 19.5–20.5 in | 28.5–30 in | 48–50 in | 45.5–47.5 in |
Notice that a standard 29 to 30 inch desk only fits seated users around 6’2″ and taller without adjustments. That is why so many people end up with a footrest, a keyboard tray or a height-adjustable desk.
Monitor distance and screen size
| Screen size | Comfortable viewing distance | Minimum desk depth |
|---|---|---|
| 22–24 in | 20–28 in | 24 in |
| 27 in | 24–32 in | 27–30 in (or monitor arm) |
| 32 in | 28–36 in | 30 in plus monitor arm |
| 34 in ultrawide | 28–34 in | 30 in plus monitor arm |
With two monitors used equally, center the seam between them in front of you and angle each inward. If one is primary, center that one and place the second off to the side at the same height.
Laptops need extra parts
A laptop alone can never be ergonomic: if the keyboard is at elbow height, the screen is far too low. The fix is a laptop stand that raises the screen to eye level, plus a separate keyboard and mouse. A stand that lifts the screen 6 to 8 inches covers most people.
Standing and switching positions
For standing work, the same rules apply: elbows at 90 degrees, keyboard at elbow height, monitor top at eye level. Standing desk height usually lands 14 to 17 inches above seated keyboard height. Switching positions every 30 to 60 minutes matters more than how long you stand. An anti-fatigue mat roughly 3/4 inch thick and supportive shoes make standing stretches easier on the feet and knees.
Lighting and glare
- Place the monitor perpendicular to windows, not facing them or with a window directly behind.
- Aim for ambient light around 300 to 500 lux for screen work; brighter rooms wash out the display.
- A desk lamp with an asymmetric or adjustable head lights paperwork without bouncing off the screen.
- Match screen brightness to the room: a white page on screen should look like a sheet of paper on the desk, not a light source.
Common setup mistakes and fixes
| Symptom | Likely cause | Fix |
|---|---|---|
| Neck ache, chin pushed forward | Monitor too low or too far | Raise screen to eye level, bring it to arm’s length |
| Shoulder and upper-trap tension | Desk or armrests too high | Raise chair plus footrest, or lower desk and armrests |
| Wrist soreness | Wrists bent up, mouse too far out | Fold keyboard feet, move mouse next to keyboard |
| Lower back pain by afternoon | No lumbar support, perched on seat edge | Sit back fully, adjust lumbar height and recline |
| Numb thighs, pressure behind knees | Seat too high or too deep | Lower seat, shorten seat depth, add footrest |
| Eye strain and headaches | Glare, screen too close, too bright | Move screen out of window glare, adjust distance and brightness |
A five-minute check you can repeat
- Feet flat, thighs level, 2 to 3 inches behind the knees.
- Back against the chair, lumbar in the curve.
- Shoulders relaxed, elbows near 90 degrees at the keyboard.
- Wrists straight, mouse beside the keyboard.
- Eyes level with the top of the screen at arm’s length.
Run through this list whenever you change chairs, desks or monitors, or whenever discomfort shows up. Small adjustments of half an inch to an inch are often all it takes, and the cheapest fixes, a footrest, a laptop stand or a box under the monitor, solve most problems before any new furniture is needed.