Key takeaways
- Compare the track, moving mechanism and remaining leg space with a desk crossbar before choosing a keyboard tray or spacer.
What's inside
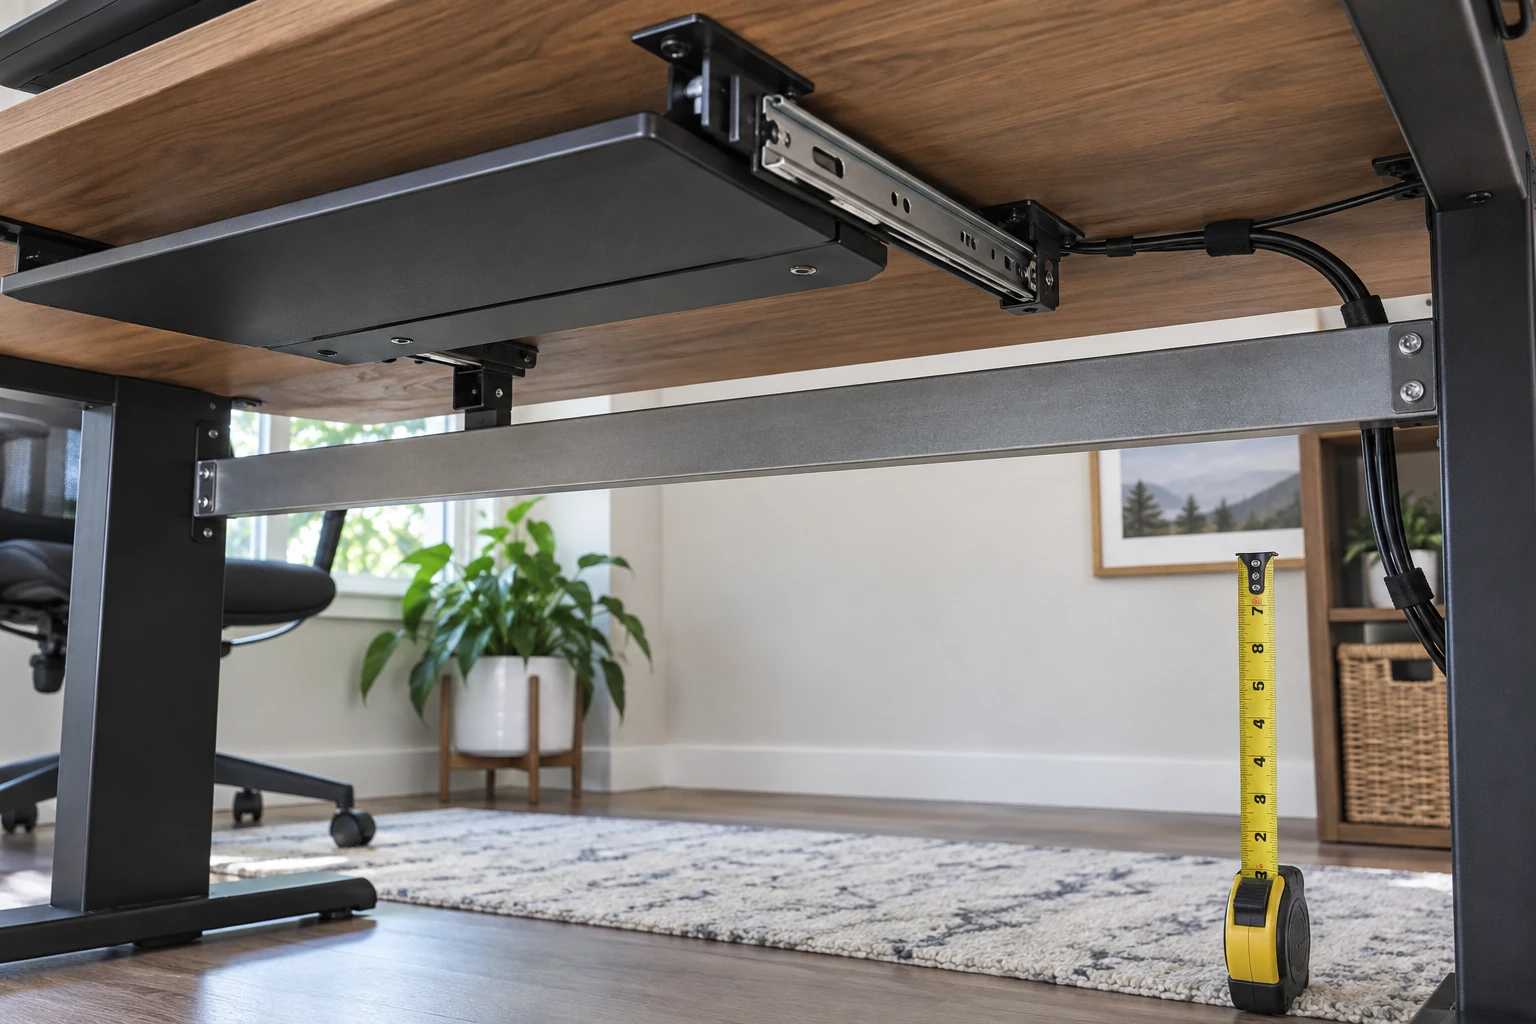
To check a keyboard tray against a desk crossbar, compare three things: the mounting track footprint, the mechanism’s movement and the space left for your legs. A track that fits ahead of the crossbar may still leave the tray projecting when stored. A spacer that clears the bar may lower the mechanism into your knee space.
Identify the complete keyboard system
Record the platform, mechanism, track and any mounting accessories as separate components. Similar tray surfaces can be supplied with different tracks. Do not use the platform’s width as the mounting footprint, and do not assume the length in a product title describes how far the assembled tray retracts.
Humanscale’s keyboard-system FAQ explicitly notes that track length, board size and mouse-platform shape can differ between models. The practical consequence is to check the exact configuration you will receive, including the side on which the mouse platform operates.
Map the underside from the front edge
Draw a top-down view as though you could see through the desktop. Use its front edge as zero. Mark the nearest and farthest edges of the crossbar, its width across the desk and its drop below the underside. Add brackets, drawers, power boxes and cable trays rather than measuring only the largest bar.
Keep the desk stationary while inspecting it. On a height-adjustable desk, identify which components travel with the top and which remain elsewhere. Do not put your hands or body into moving parts to discover the answer. Use the desk documentation and accessible measurements before any later operational check.
| Area | Desk information | Tray-system information |
|---|---|---|
| Mounting surface | Clear depth and width, top material/thickness | Track outline, fastening requirements and front setback |
| Crossbar | Near edge, far edge and drop below top | Mechanism depth at corresponding positions |
| Working position | Leg space and chair position | Tray extension, height and tilt range |
| Stored position | Available space behind/front of bar | Retracted platform and mechanism envelope |
| Cables | Existing cable route and fixed connections | Movement needed without tension or pinching |
Distinguish the track from the moving mechanism
The Humanscale keyboard-system assembly instructions show a track fixed beneath the desk, a mechanism that slides into it toward rear stops, and a front end cap. This is why both the track and the space needed to insert and move the mechanism must be considered. The platform is attached separately; its final position cannot be inferred from the bare track alone.
Obtain a dimensioned drawing for the selected configuration. Compare it in the working, retracted and relevant adjustment positions. If the manufacturer’s documents do not show the complete movement envelope, ask for confirmation using your underside sketch. A rectangular paper template is useful for checking a footprint, but it cannot prove moving parts will clear.
Worked example: a track that reaches the crossbar
Suppose the nearest face of the crossbar is 400 mm behind the desk’s front edge. In this illustrative example, the proposed mounting track is 460 mm long and its front begins 10 mm behind that edge. Its rear reaches 470 mm, crossing the bar’s near face by 70 mm. A flush-mounted track therefore conflicts with a crossbar occupying that same mounting plane.
A 350 mm track beginning at the same point would end at 360 mm, leaving 40 mm before the bar. That arithmetic only clears the track footprint. You still need to establish whether that shorter track is approved for the mechanism, whether the platform retracts as desired and whether the mechanism sweeps into the crossbar below it.
Do not cut a track to match the arithmetic. A shorter approved option can change storage and travel behavior. Keep “track clears” and “complete system clears” as separate lines in the decision record.
Evaluate spacers as a complete configuration change
Humanscale’s manual library lists keyboard drop-down spacer instructions separately from keyboard installation instructions. That distinction matters: a spacer is an accessory configuration with its own requirements, not an invitation to stack arbitrary blocks beneath the desk.
If the manufacturer proposes a compatible spacer, ask for the new installed drop, fastening requirements and movement drawing. Then recheck actual leg space at your intended seated position. Clearing a crossbar is not a successful result if the tray or mechanism now occupies the space you need to sit and move.
Resolve fastening and use before purchase
Confirm that the desktop construction accepts the specified attachment. The geometry worksheet does not certify screw holding, surface strength or suitability of glass and hollow-core tops. Keep required fasteners tied to the approved configuration rather than substituting longer screws because a spacer was added.
Finally, check the full keyboard and mouse arrangement on the platform, cable movement and how far it projects into the room when stored. Send the desk model, measurements and exact tray components to the supplier when any dimension is missing. Record “unresolved” instead of treating an omitted dimension as zero.
Your final decision should explain why the mounting footprint fits, why the mechanism clears throughout its intended motion and why the remaining workspace is usable. Those three checks are more informative than a general claim that a tray is compatible with standing desks.
If another accessory clamps to the edge, use the desk-apron clearance worksheet to check its contact pad and installation path separately.