Key takeaways
- Build a clear missing-hardware request with the desk model, manual part code, required count and photos before substituting a similar-looking screw.
Pause assembly at the step that needs the missing part, then document the desk model, manual part code and quantity short. Include a photograph of the supplied hardware and the relevant instruction step. A precise request gives customer support something it can identify without guessing from a description such as “the long silver screw.”
Check the package count first
Compare the delivered cartons with the order and assembly instructions. Some furniture arrives in multiple boxes, and a hardware pack may be in a separate compartment. Inspect packaging carefully without discarding it, but do not dismantle a factory-assembled component to search for a part unless the instructions tell you to.
Keep packing labels, the receipt and the assembly booklet until the issue is resolved. Photograph a damaged bag or opened carton if relevant. Report what you can observe, rather than deciding that the carrier or factory caused the loss without evidence.
IKEA’s missing-parts guidance begins with checking all boxes and distinguishing parts that have an instruction-guide code from those that do not. That is one manufacturer’s process, not a promise that every furniture seller offers the same replacement service. Follow the route provided by your actual seller.
Match the exact desk and manual
Record the product name, article or model number, finish variant and order reference. Find the assembly instructions for that exact version. A similarly named desk can use different fittings, so a picture from another size or an older revision may send support toward the wrong component.
Save the manual file name or revision if shown. Use the parts list and the assembly step together: the list identifies the component, while the step shows its intended location. If the booklet is missing, request the correct instructions before continuing from an online image that happens to look close.
| Field | What to enter |
|---|---|
| Desk identity | Model, size, finish and order reference |
| Manual reference | File/revision, page and assembly step |
| Part identity | Exact printed code, or clearly marked “no code shown” |
| Quantity | Required total, supplied count and shortage |
| Photographs | Hardware overview, bag label and instruction detail |
| Assembly state | Last completed step and whether the desk remains unused |
Count without merging similar pieces
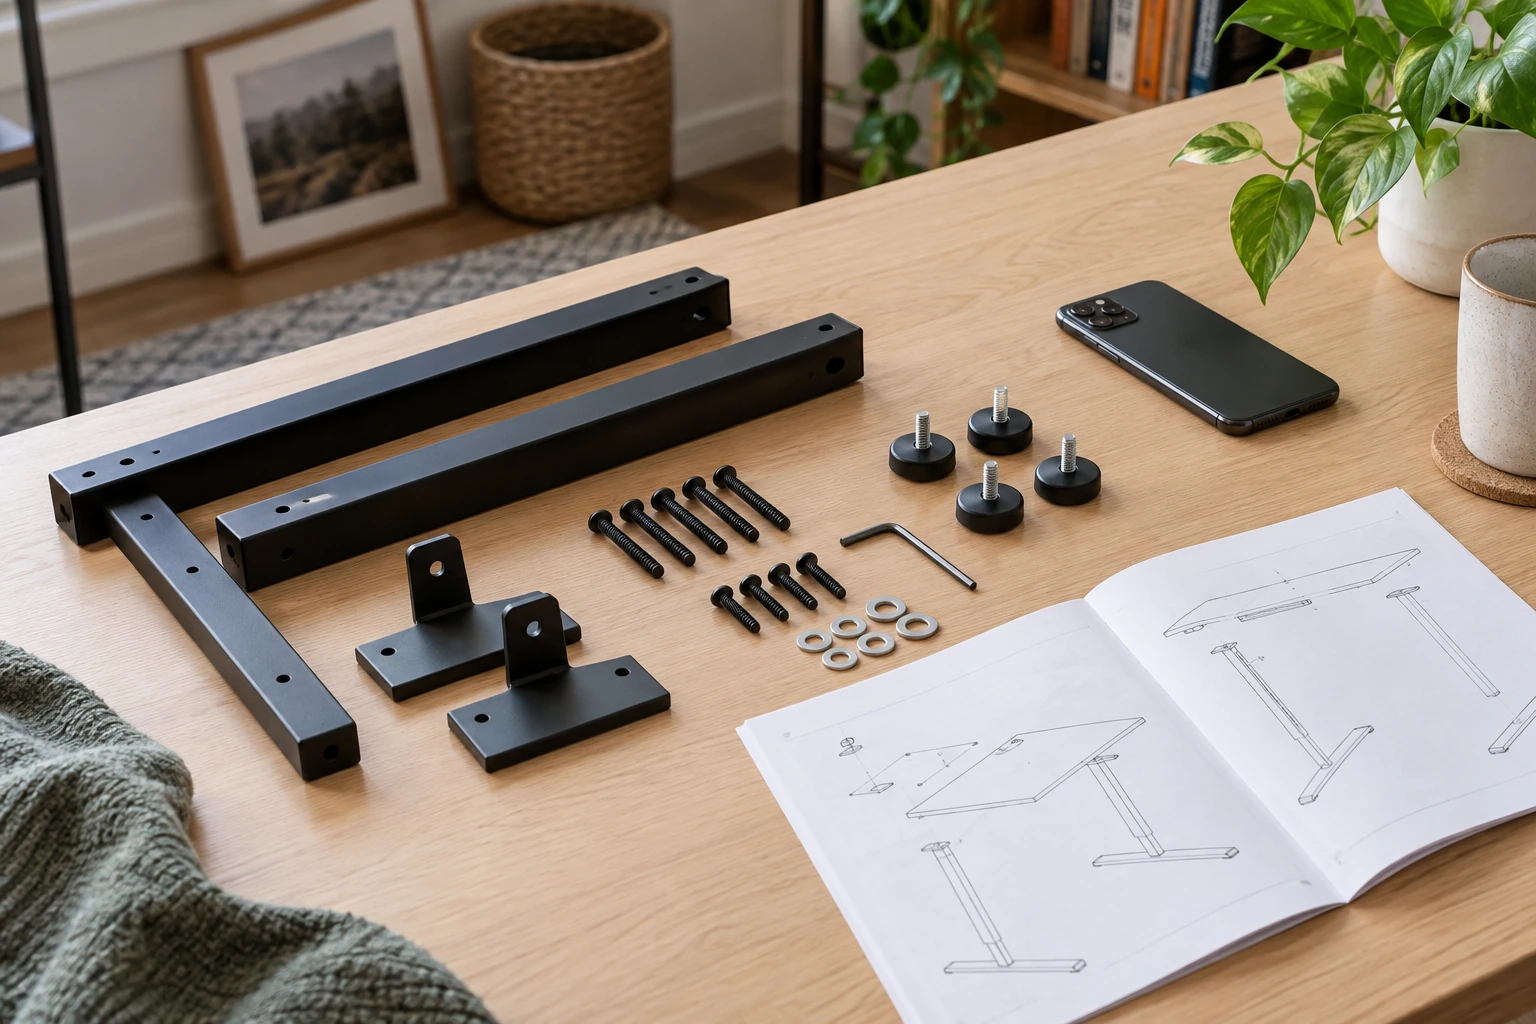
Sort hardware into separate groups on a stable, clear surface away from children and pets. Use the manual’s drawings and codes to distinguish pieces. Keep bags and labels beside their groups. Similar heads do not establish identical length, thread or intended purpose.
Record uncertainty explicitly. If two pieces look alike and the manual drawing does not resolve them, photograph both and ask support. Do not declare one group complete by borrowing a fitting from a later step. That merely moves the shortage and can leave the final assembly incorrect.
In a hypothetical example, the parts list calls for eight fittings labeled P7, while the sealed pack contains six. The shortage is two. State “P7: required eight, received six, missing two,” then attach the relevant list and pack photo. P7 is an invented example label here; copy the real code from your own manual.
Take photographs that answer a question
Begin with an overview showing the sorted hardware and its packaging. Add a close view of any supplied matching part, with a ruler nearby when support requests scale. Keep the camera straight enough to avoid a misleading perspective. A photograph cannot establish an exact thread specification, so do not use it as the sole basis for buying a substitute.
Capture the instruction step that uses the part and the part-list entry. For a missing fitting with no surviving sample, these images may be more useful than an empty space in a bag. Keep personal order details out of public posts; send the receipt through the seller’s normal support channel when needed.
Write one complete support message
Use a short subject such as “Missing hardware for desk model [model].” In the message, identify the order, list the code and shortage, name the stalled assembly step, and attach the photos. Ask for the correct replacement and whether any temporary assembly state needs attention while you wait.
A useful request ends with a concrete question: “Please confirm the correct part for this model and the replacement process.” Avoid adding unrelated product questions to the same message, which can make the missing component harder to track. Keep the case number and the seller’s reply with the project notes.
Wait for a confirmed resolution
Do not use a partially assembled desk or substitute a screw merely because it seems to fit. Length, thread and hardware type can matter to the joint, and an improvised replacement may damage the furniture. Obtain a manufacturer-approved specification or replacement before continuing.
When the new hardware arrives, compare its identifying information with the response and manual. Resume from the verified step and complete the remaining checks in the instructions. Retain the final part information and support case so any later question can be tied to the exact desk rather than to a generic photograph of similar hardware.