Key takeaways
- Support the front of the unit or use a cleaning bag when applying liquid; never let runoff travel toward the room-side controls.
- Use a vacuum and brush before chemical cleaner. Removing dry dust first reduces mess and minimizes chemical exposure.
- Do not bend fins with a screwdriver, knife, or improvised metal tool. Damaged fins can reduce heat transfer and create sharp edges.
- If the unit is heavy or installed above shoulder height, have another adult stabilize it rather than reaching, twisting, or lifting awkwardly.
What's inside
A window air conditioner does more than cool a room: it also traps dust, lint, pollen, and moisture in a compact cabinet. When that buildup restricts airflow, the unit works harder, cools less evenly, and may develop musty odors or drain poorly. Cleaning it well is therefore a comfort task, an energy-efficiency task, and a durability task.
This guide explains the safest, least awkward way to clean a window AC without bending delicate fins or forcing water toward electrical parts. You’ll learn which tools are worth having, when a coil cleaner is appropriate, how to protect furniture and flooring, and when cleaning should give way to professional service or replacement.
As an Amazon Associate we earn from qualifying purchases.




Recommended picks
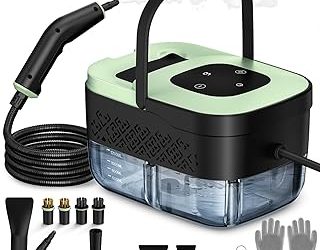
For a contained, low-mess job, the Oiktylr Mini Split Cleaning Kit with 2L Pressure Sprayer is useful because its waterproof bag helps catch runoff. Although marketed for larger systems, its enclosure concept can be helpful around many window units—check the dimensions before buying. For light dust and fin straightening, the 3-Piece Air Conditioner Fin Comb Cleaning Tools set combines a brush, fin comb, and small cleaning tool in one compact kit.
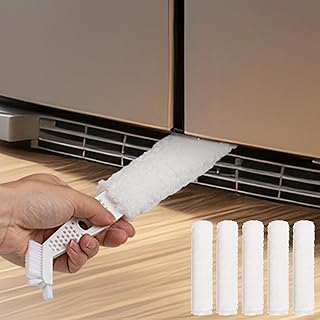
If you prefer cleaning without removing the unit, the Air Conditioner Cleaner Set Mini Split Cleaning Kit Under Fridge Cleaning Tool includes five replaceable brush cloths for reaching narrow spaces behind and beneath the cabinet. For chemical cleaning, Arm & Hammer Biodegradable HVAC and Air Conditioner Coil Cleaner Foam Aerosol Spray, 19 fl. oz, AHCC-19 by Diversitech, is a convenient small-can option. Larger jobs may justify Foaming AC Coil Cleaner, 38oz for Evaporators & Condensers or the 57 oz Deep-Penetrating No-Rinse Foam Cleaner. Use any chemical only as its label directs and verify that it is suitable for your coil type.
1. Shut down, unplug, and prepare the work area
Turn the unit off with its controls, unplug it from the wall, and wait several minutes before opening or cleaning it. Never rely on the remote, a power button, or a switched outlet alone. If the plug, cord, or outlet is warm, damaged, or discolored, stop and arrange an electrical inspection.
Protect the floor and nearby furniture with a waterproof sheet, towels, or a shallow catch tray. If the AC is installed high in a window, use a stable platform rather than standing on a chair. A headlamp, nitrile gloves, safety glasses, a soft brush, a vacuum with a brush attachment, and clean microfiber cloths make the job easier on your back and hands.
2. Remove and wash the filter first
Take out the front filter according to the manufacturer’s instructions. Vacuum loose dust before rinsing so you do not turn dry debris into paste. Wash a washable filter in lukewarm water with a small amount of mild dish soap, then rinse thoroughly. Let it dry completely—ideally several hours—before reinstalling it.
Do not scrub aggressively, use boiling water, or reinstall a damp filter. A filter that is warped, brittle, or permanently gray should be replaced with the correct size and rating. A poorly fitting filter allows dust to bypass the coil and undermines every other cleaning step.
3. Clean the evaporator coil and indoor surfaces
With the front cover removed or opened as designed, vacuum the evaporator coil gently in the direction of the fins. The aluminum fins are thin and easily bent, so keep the nozzle just above the surface rather than pressing it against the coil. Use a soft brush for stubborn lint, working from top to bottom.
A fin comb is helpful for isolated bent sections, but choose the comb spacing that matches the fins and use light pressure. Do not try to make every fin perfect; restore airflow paths without scraping the coil. For routine grime, a purpose-made foaming coil cleaner can loosen residue. Apply sparingly, keep the spray away from wiring and controls, and follow the label’s dwell time and rinsing instructions. “No-rinse” does not mean “safe to spray everywhere.”
4. Clean the blower, drain path, and exterior cabinet
Dust on the blower wheel can cause vibration and reduce air delivery. Brush or vacuum what you can reach without forcing tools deep into the fan housing. Wipe plastic louvers, the front grille, and the cabinet with a barely damp cloth. Keep moisture out of the control panel, motor, capacitor area, and plug.
Inspect the drain opening or pan for sludge, leaves, and insect debris. Clear only accessible material with a soft brush or cloth; do not poke blindly into the cabinet. A unit that repeatedly leaks indoors, freezes over, smells strongly musty after cleaning, or makes a new grinding sound may have a blocked drain, refrigerant issue, failing motor, or internal mold problem requiring service.
5. Reassemble and test carefully
Confirm that every cleaned part is dry and that the filter is seated correctly. Refit the front grille and any screws, then reconnect power. Run the unit in fan mode first for several minutes, listening for rubbing, rattling, or unusual vibration. Switch to cooling and check that air is moving freely and that water is draining outdoors as intended.
From an ergonomics standpoint, finish by storing tools where they are easy to reach next season. A short, repeatable maintenance routine is more sustainable than an exhausting deep clean that gets postponed indefinitely. Clean the filter every two to four weeks during heavy use and inspect the coil at least once each season.
Tips
- Support the front of the unit or use a cleaning bag when applying liquid; never let runoff travel toward the room-side controls.
- Use a vacuum and brush before chemical cleaner. Removing dry dust first reduces mess and minimizes chemical exposure.
- Do not bend fins with a screwdriver, knife, or improvised metal tool. Damaged fins can reduce heat transfer and create sharp edges.
- If the unit is heavy or installed above shoulder height, have another adult stabilize it rather than reaching, twisting, or lifting awkwardly.
Frequently Asked Questions
How often should a window air conditioner be cleaned?
Clean or inspect the filter every two to four weeks during active use. Give the coil, blower area, drain path, and cabinet a more thorough inspection at the beginning and end of the cooling season, or sooner if airflow drops or odors appear.
Can I hose down a window AC?
Usually not while it is installed indoors or connected to power. Uncontrolled water can reach electrical components, insulation, flooring, or furniture. Use targeted wiping, vacuuming, and a purpose-built catch bag instead. Follow the owner’s manual if it specifies a removable outdoor chassis and approved washing procedure.
Should I use bleach to remove a musty smell?
Bleach is a poor default choice for an air conditioner. It can damage metals, create irritating fumes, and fail to remove contamination hidden inside the cabinet. Start with filter and drain maintenance and use a coil product labeled for HVAC equipment. Persistent odor usually warrants professional inspection.
When should I replace rather than clean the unit?
Consider replacement when the cabinet or coil is heavily corroded, the unit repeatedly leaks, the fan or compressor is failing, or repairs approach the cost of a newer, more efficient model. Cleaning cannot correct refrigerant loss, damaged wiring, or structural deterioration.
Conclusion
The best window AC cleaning method is controlled rather than forceful: disconnect power, protect the room, remove dust before moisture, treat fins gently, and keep liquids away from electrical components. With a soft brush, suitable vacuum, correctly sized filter, and—when needed—a labeled foaming coil cleaner, most seasonal maintenance can be completed safely without stressing the appliance or your back.